참고 교재 : Joyce의 안드로이드 앱 프로그래밍 - 홍정아
전체 코드가 궁금하다면 아래 링크를 참고하시길 바랍니다.
원본 코드 : Joyce의 안드로이드 앱 프로그래밍 - 홍정아
3. 레이아웃 구성하기
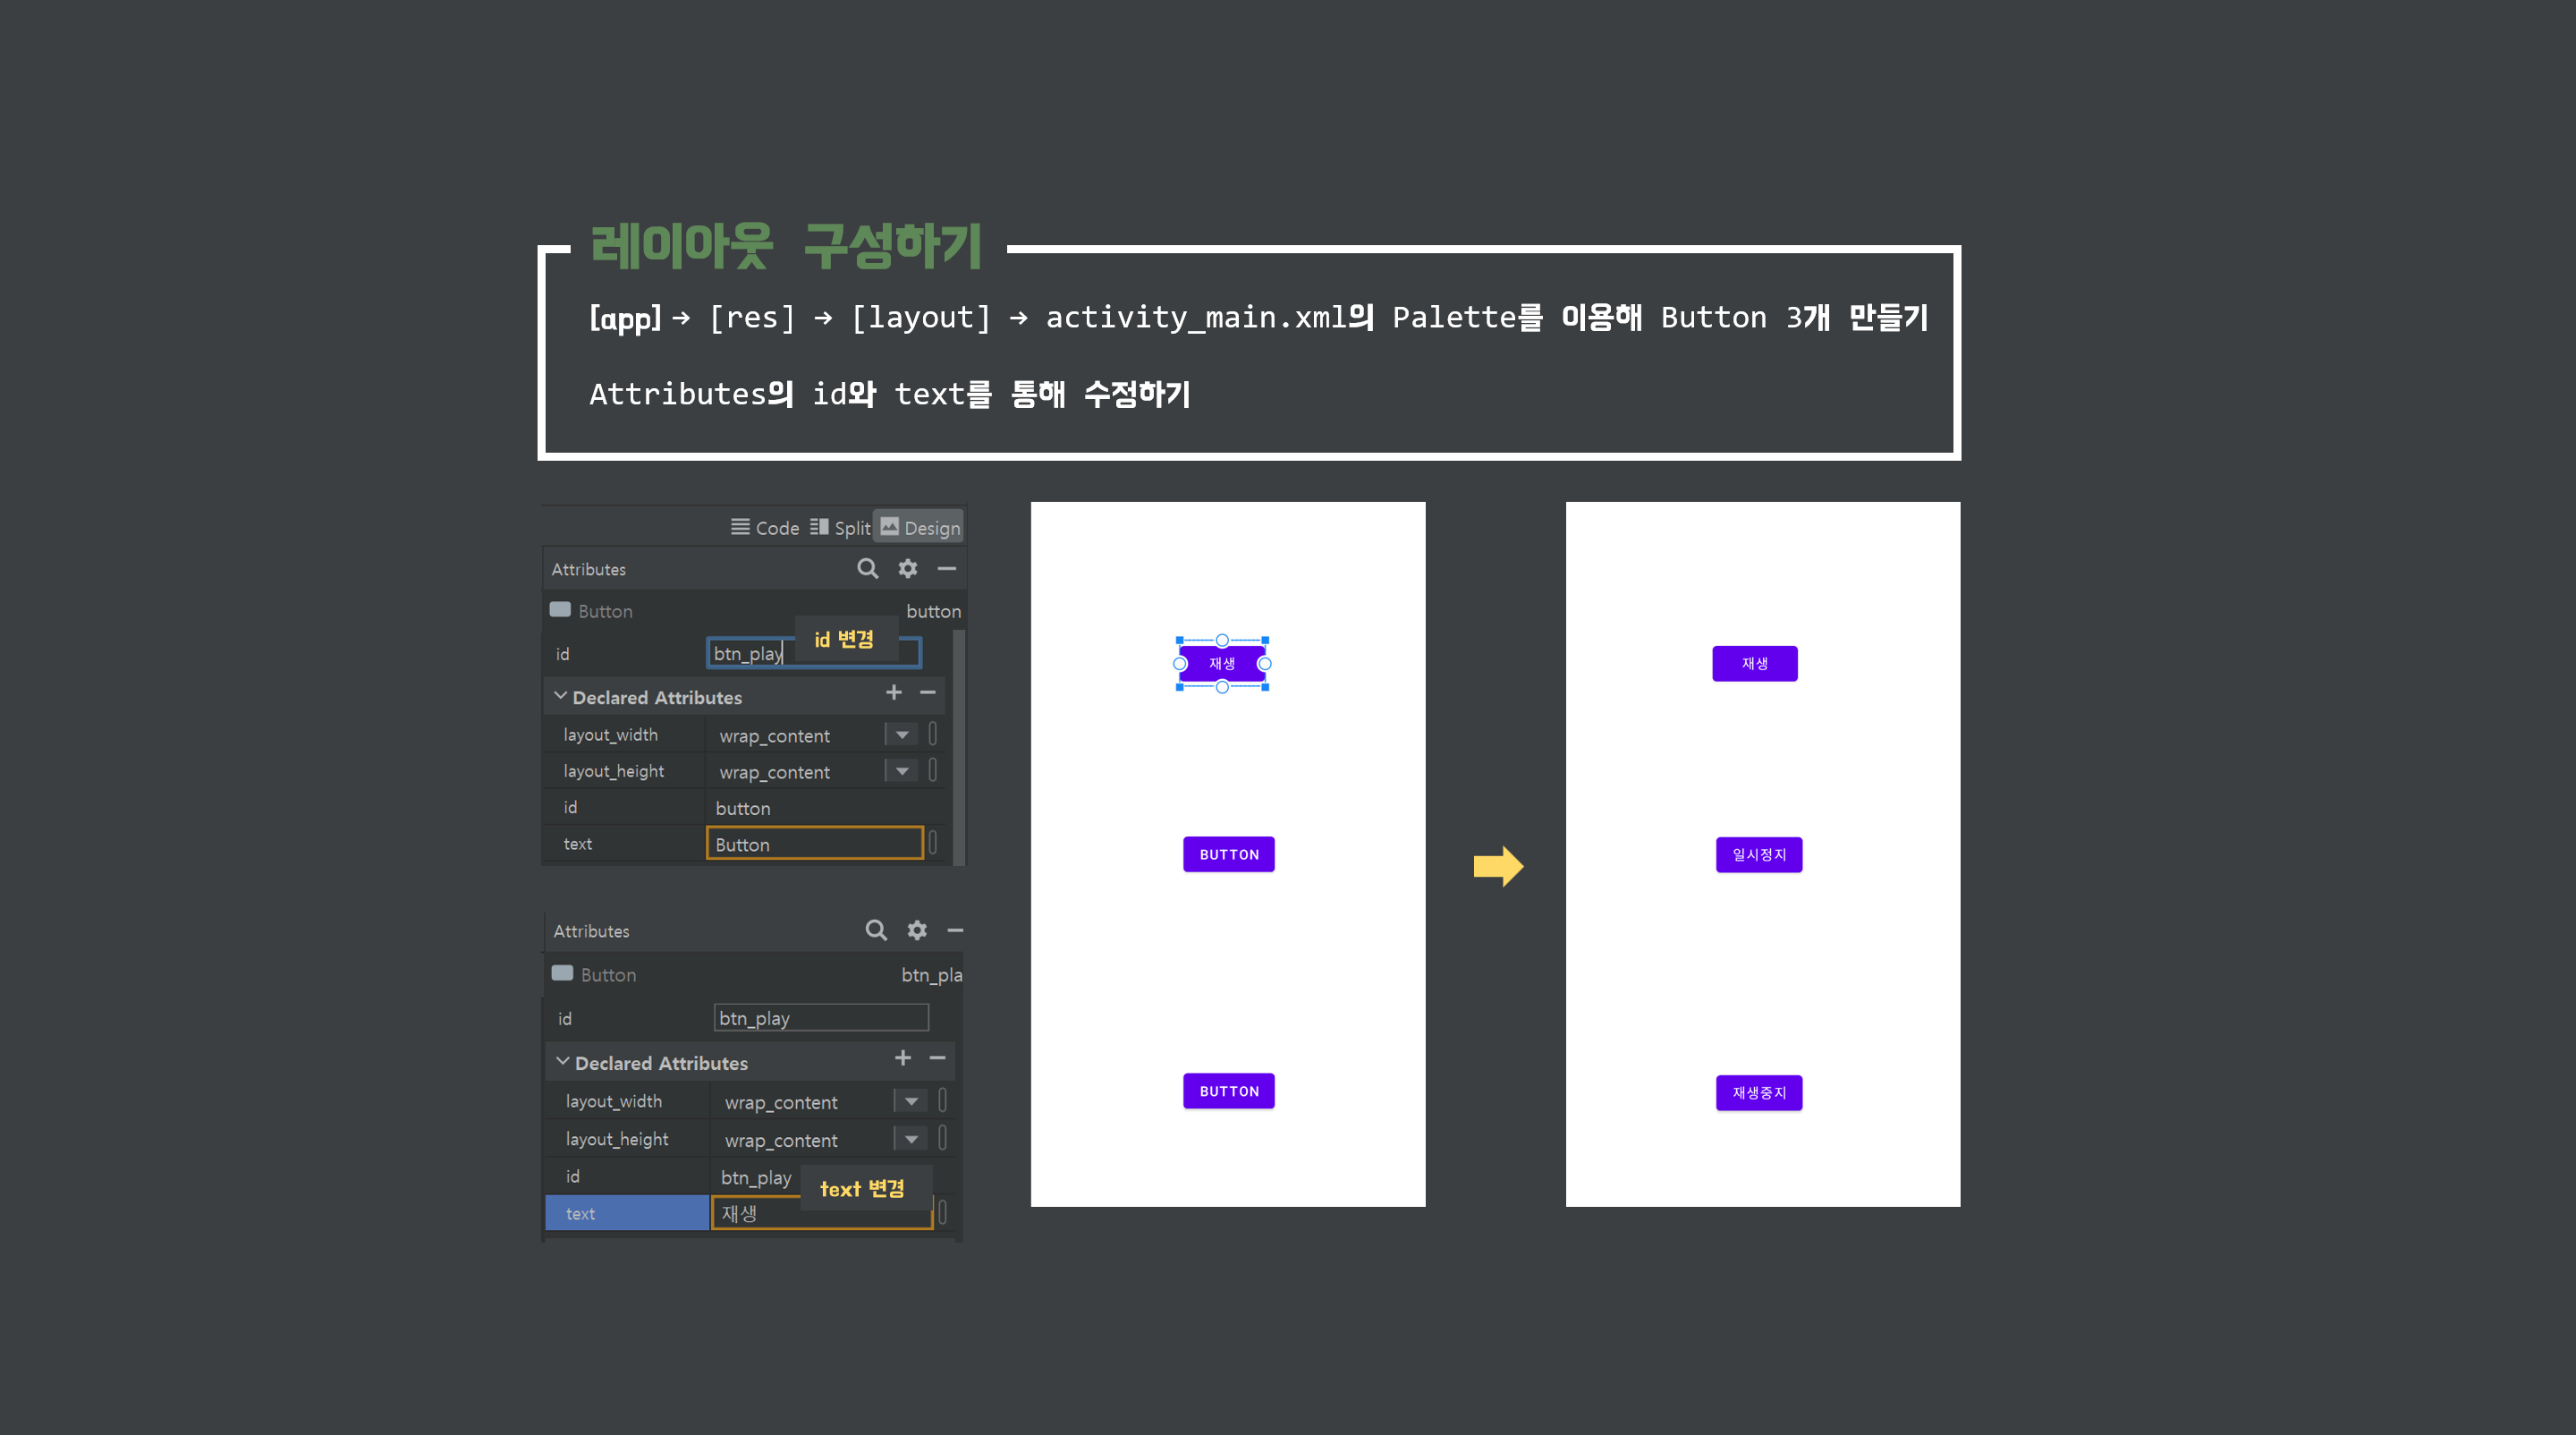
Design 탭의 Palette를 이용해 button 3개를 만들어 준 뒤 위에서 부터 재생, 일시정지, 재생중지 라는 이름으로 text와 id를 수정해 줍니다.
버튼 정렬_ 수직 정렬

버튼 3개를 ctrl 키를 누른 상태로 눌러 동시 선택합니다.
그 이후 우클릭을 하여 Chains → Create Vertical Chain 을 선택하여 수직 방향의 너비를 균등하게 분배합니다.
버튼 정렬_ 수평 정렬

다시 버튼 3개를 ctrl 키를 누른 상태로 눌러 동시 선택합니다.
우클릭하여 이번에는 Center → Horizontally in Parent 를 선택합니다.
그러면 오른쪽 이미지와 같이 부모 레이아웃에 맞춰 가로 기준 가운데 정렬을 하게 됩니다.
이러한 방식으로 버튼을 수직 & 수평 정렬할 수 있습니다.
[코드]
<?xml version="1.0" encoding="utf-8"?>
<androidx.constraintlayout.widget.ConstraintLayout xmlns:android="http://schemas.android.com/apk/res/android"
    xmlns:app="http://schemas.android.com/apk/res-auto"
    xmlns:tools="http://schemas.android.com/tools"
    android:layout_width="match_parent"
    android:layout_height="match_parent"
    tools:context=".MainActivity">

    <Button
        android:id="@+id/btn_play"
        android:layout_width="wrap_content"
        android:layout_height="wrap_content"
        android:text="@string/btn_play"
        app:layout_constraintBottom_toTopOf="@+id/btn_pause"
        app:layout_constraintEnd_toEndOf="parent"
        app:layout_constraintHorizontal_bias="0.5"
        app:layout_constraintStart_toStartOf="parent"
        app:layout_constraintTop_toTopOf="parent" />

    <Button
        android:id="@+id/btn_pause"
        android:layout_width="wrap_content"
        android:layout_height="wrap_content"
        android:text="@string/btn_pause"
        app:layout_constraintBottom_toTopOf="@+id/btn_stop"
        app:layout_constraintEnd_toEndOf="parent"
        app:layout_constraintHorizontal_bias="0.5"
        app:layout_constraintStart_toStartOf="parent"
        app:layout_constraintTop_toBottomOf="@+id/btn_play" />

    <Button
        android:id="@+id/btn_stop"
        android:layout_width="wrap_content"
        android:layout_height="wrap_content"
        android:text="@string/btn_stop"
        app:layout_constraintBottom_toBottomOf="parent"
        app:layout_constraintEnd_toEndOf="parent"
        app:layout_constraintHorizontal_bias="0.5"
        app:layout_constraintStart_toStartOf="parent"
        app:layout_constraintTop_toBottomOf="@+id/btn_pause" />
</androidx.constraintlayout.widget.ConstraintLayout>
버튼 속 텍스트를 리소스 파일을 사용해 지정하기

버튼 속 text를 직접 재생, 일시정지, 재생중지와 같이 작성하면 Hardcoded string 이라는 경고 메시지가 뜹니다.
즉 하드코딩을 했다는 것입니다. 이렇게 당장 하드코딩을 하면 간단하여 편리하지만 추후에 해당 text를 수정할 때 일일이 찾아야하기 때문에 불편합니다. 이 외에도 여러가지 이유가 있습니다.
추후에 따로 이 부분에 대해서는 정리를 해놓겠습니다.
그러하여 리소스 파일을 사용해 지정하는 습관을 가져야 합니다.
[app] → [res] → [values] → [string.xml] 에 위와 같이 재생, 일시정지, 재생중지를 작성합니다.
그 이후 각 버튼의 text 자리에 @string/resources name 을 적어주면 됩니다.
[코드]
<resources>
    <string name="app_name">SimpleMusicPlayer</string>
    <string name="btn_play">재생</string>
    <string name="btn_pause">일시정지</string>
    <string name="btn_stop">재생중지</string>
</resources>
※ 본 게시글은 'Joyce의 안드로이드 앱 프로그래밍 - 홍정아' 책의 내용과
Android Developers의 공식문서 내용을 참고하여 작성하였습니다.
전체 코드가 궁금하다면 아래 링크를 참고하시길 바랍니다.
'안드로이드(Android)' 카테고리의 다른 글
| 뮤직 플레이어(MusicPlayer)_5 [Android_Kotlin] (0) | 2023.03.02 |
|---|---|
| 뮤직 플레이어(MusicPlayer)_4 [Android_Kotlin] (0) | 2023.02.21 |
| 뮤직 플레이어(MusicPlayer)_2 [Android_Kotlin] (0) | 2023.02.16 |
| 뮤직 플레이어(MusicPlayer)_1 [Android_Kotlin] (0) | 2023.02.15 |
| 스톱워치(StopWatch)_3 / [Android-Kotlin] (0) | 2023.02.13 |