참고 교재 : Joyce의 안드로이드 앱 프로그래밍 - 홍정아
전체 코드가 궁금하다면 아래 링크를 참고하시길 바랍니다.
원본 코드 : Joyce의 안드로이드 앱 프로그래밍 - 홍정아
이번에는 코틀린을 이용해 스톱워치를 만들게 되었다.
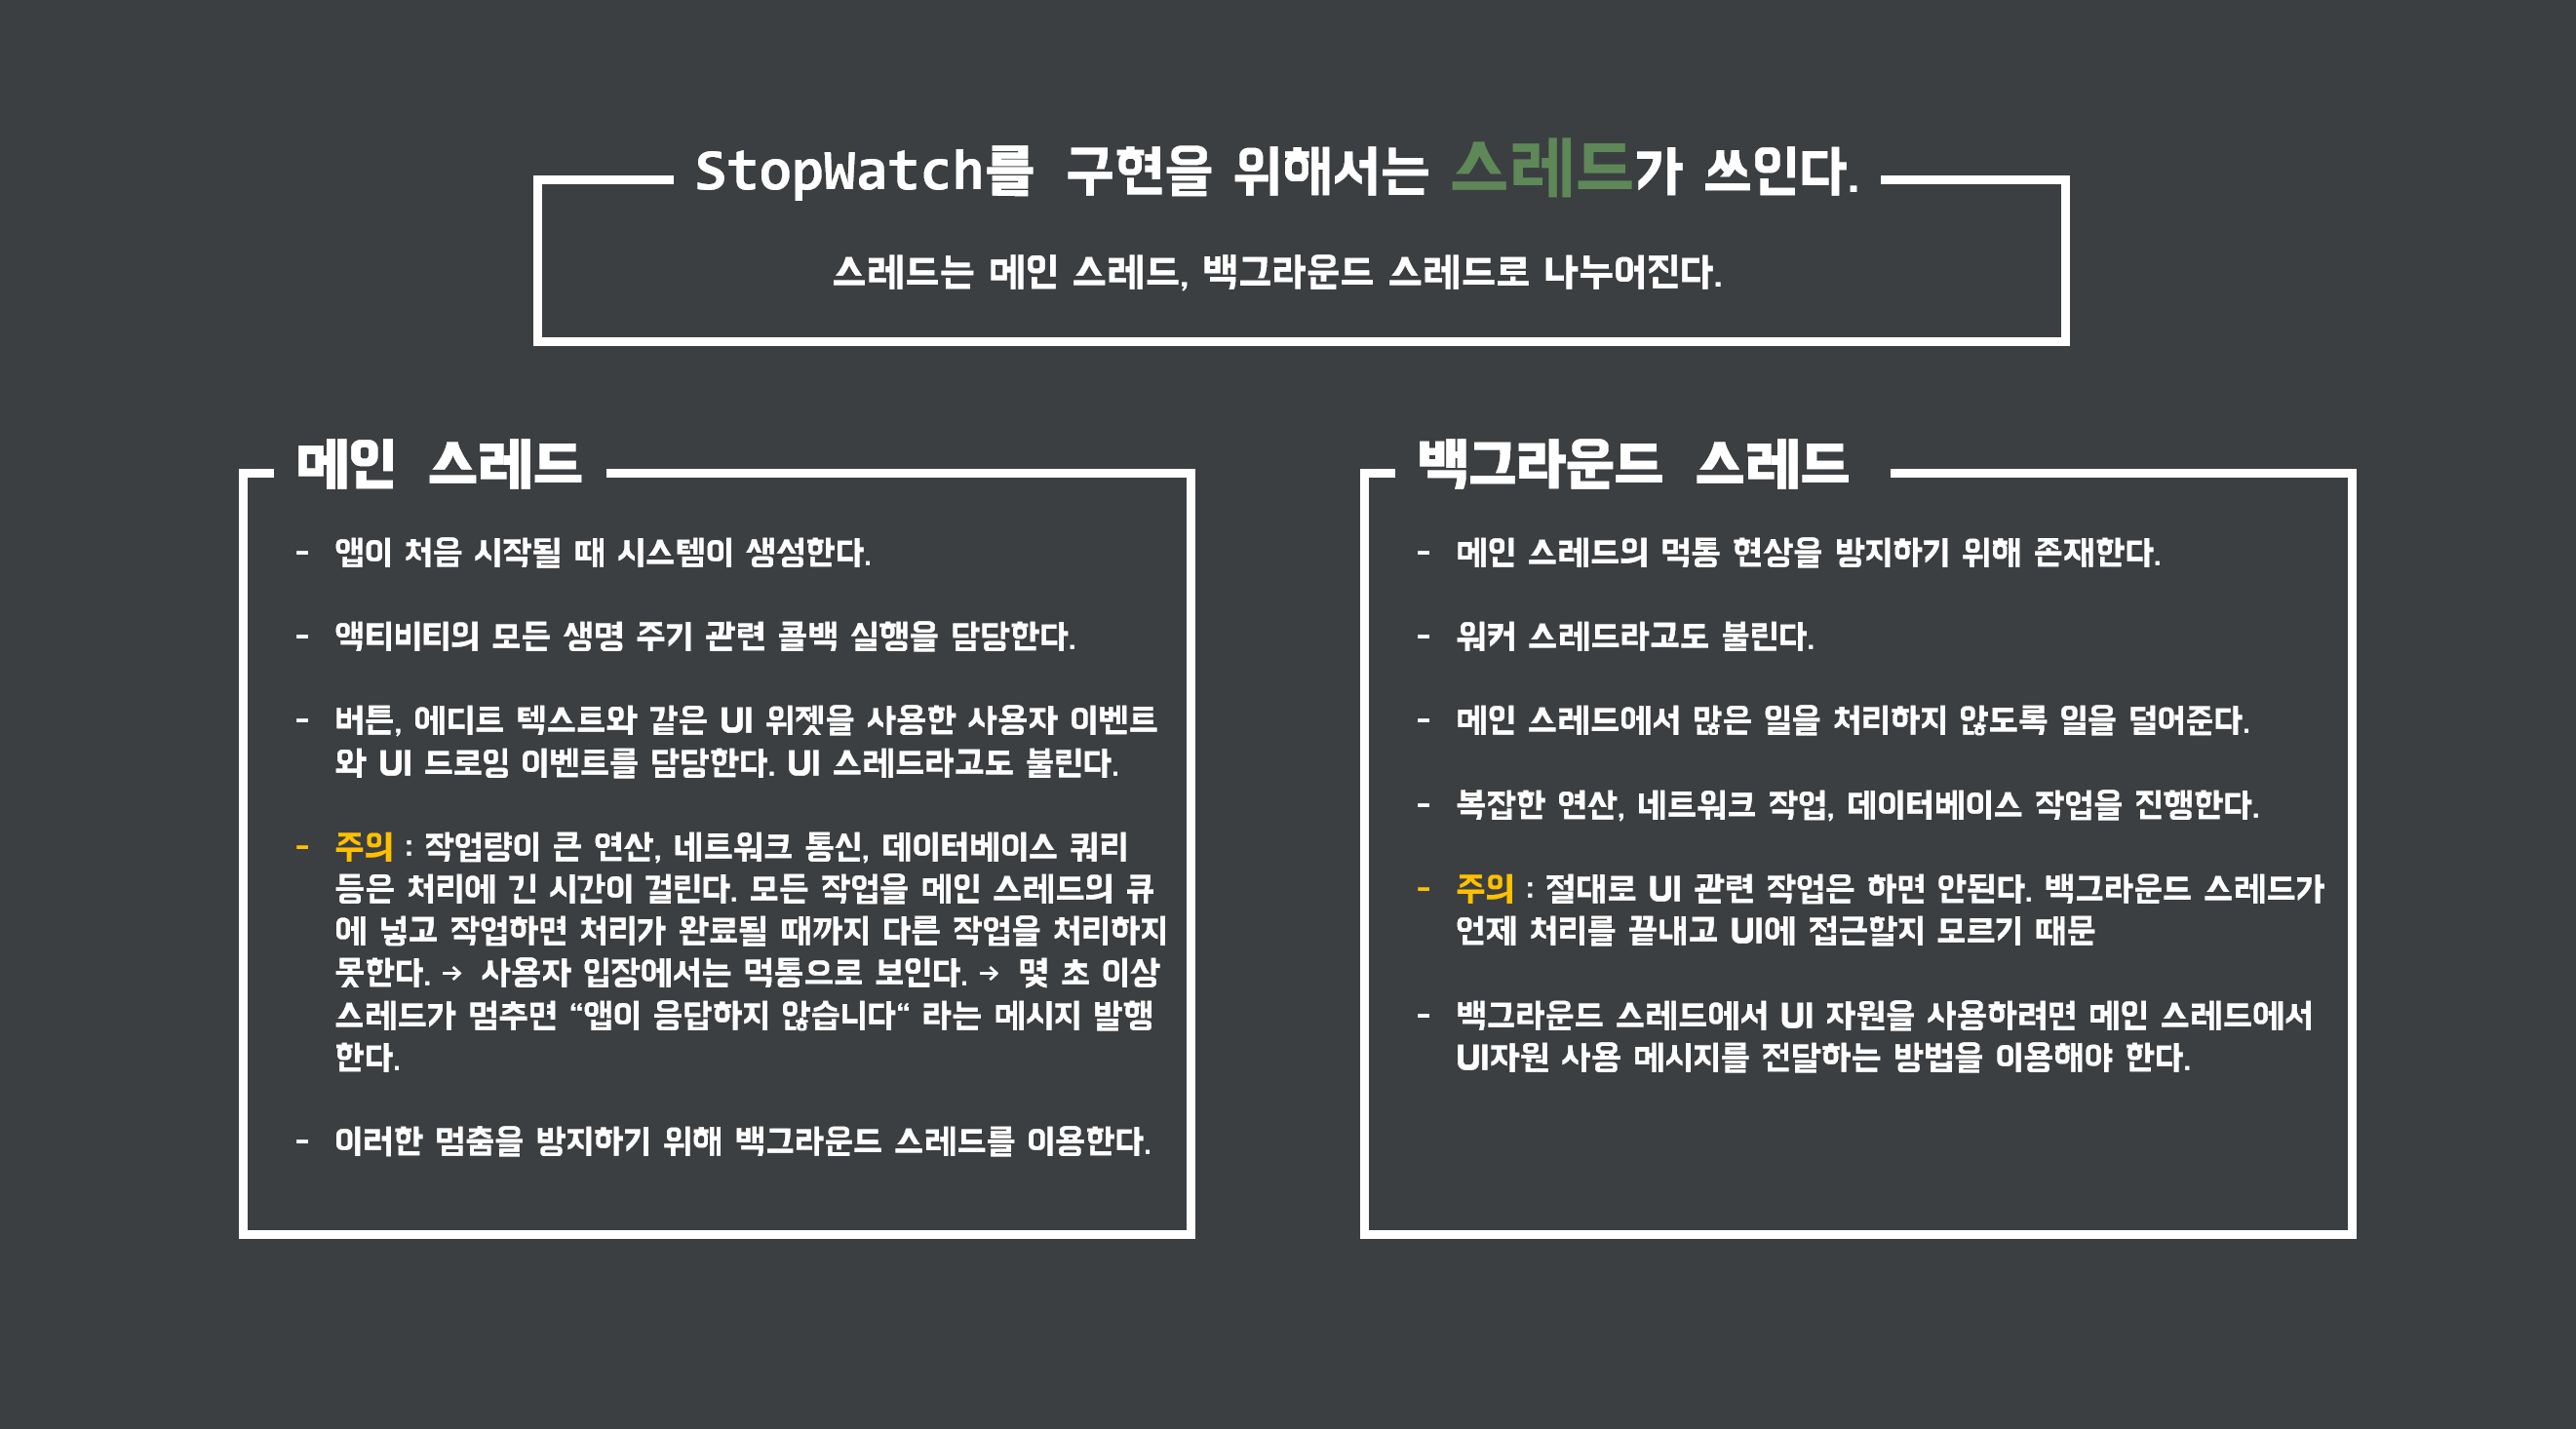
스톱워치 구현을 위해서는 스레드가 쓰인다.
스레드는 메인 스레드, 백그라운드 스레드로 나뉜다.
▶ 메인 스레드
앱이 처음 시작될 때 시스템이 생성
액티비티의 모든 생명 주기 관련 콜백 실행을 담당한다.
버튼, 에디트 텍스트와 같은 UI 위젯을 사용한 사용자 이벤트와 UI 드로잉 이벤트를 담당한다. UI 스레드라고도 불린다.
주의 : 작업량이 큰 연산, 네트워크 통신, 데이터베이스 쿼리 등은 처리에 긴 시간이 걸린다. 모든 작업을 메인 스레드의 큐에 넣고 작업하면 처리가 완료될 때까지 다른 작업을 처리하지 못한다. → 사용자 입장에서는 먹통으로 보인다. → 몇 초 이상 스레드가 멈추면 “앱이 응답하지 않습니다“ 라는 메시지 발행한다.
이러한 멈춤을 방지하기 위해 백그라운드 스레드를 이용한다.
▶ 백그라운드 스레드
메인 스레드의 먹통 현상을 방지하기 위해 존재한다.
워커 스레드라고도 불린다.
메인 스레드에서 많은 일을 처리하지 않도록 일을 덜어준다.
복잡한 연산, 네트워크 작업, 데이터베이스 작업을 진행한다.
주의 : 절대로 UI 관련 작업은 하면 안된다. 백그라운드 스레드가 언제 처리를 끝내고 UI에 접근할지 모르기 때문
백그라운드 스레드에서 UI 자원을 사용하려면 메인 스레드에서 UI자원 사용 메시지를 전달하는 방법을 이용해야 한다.
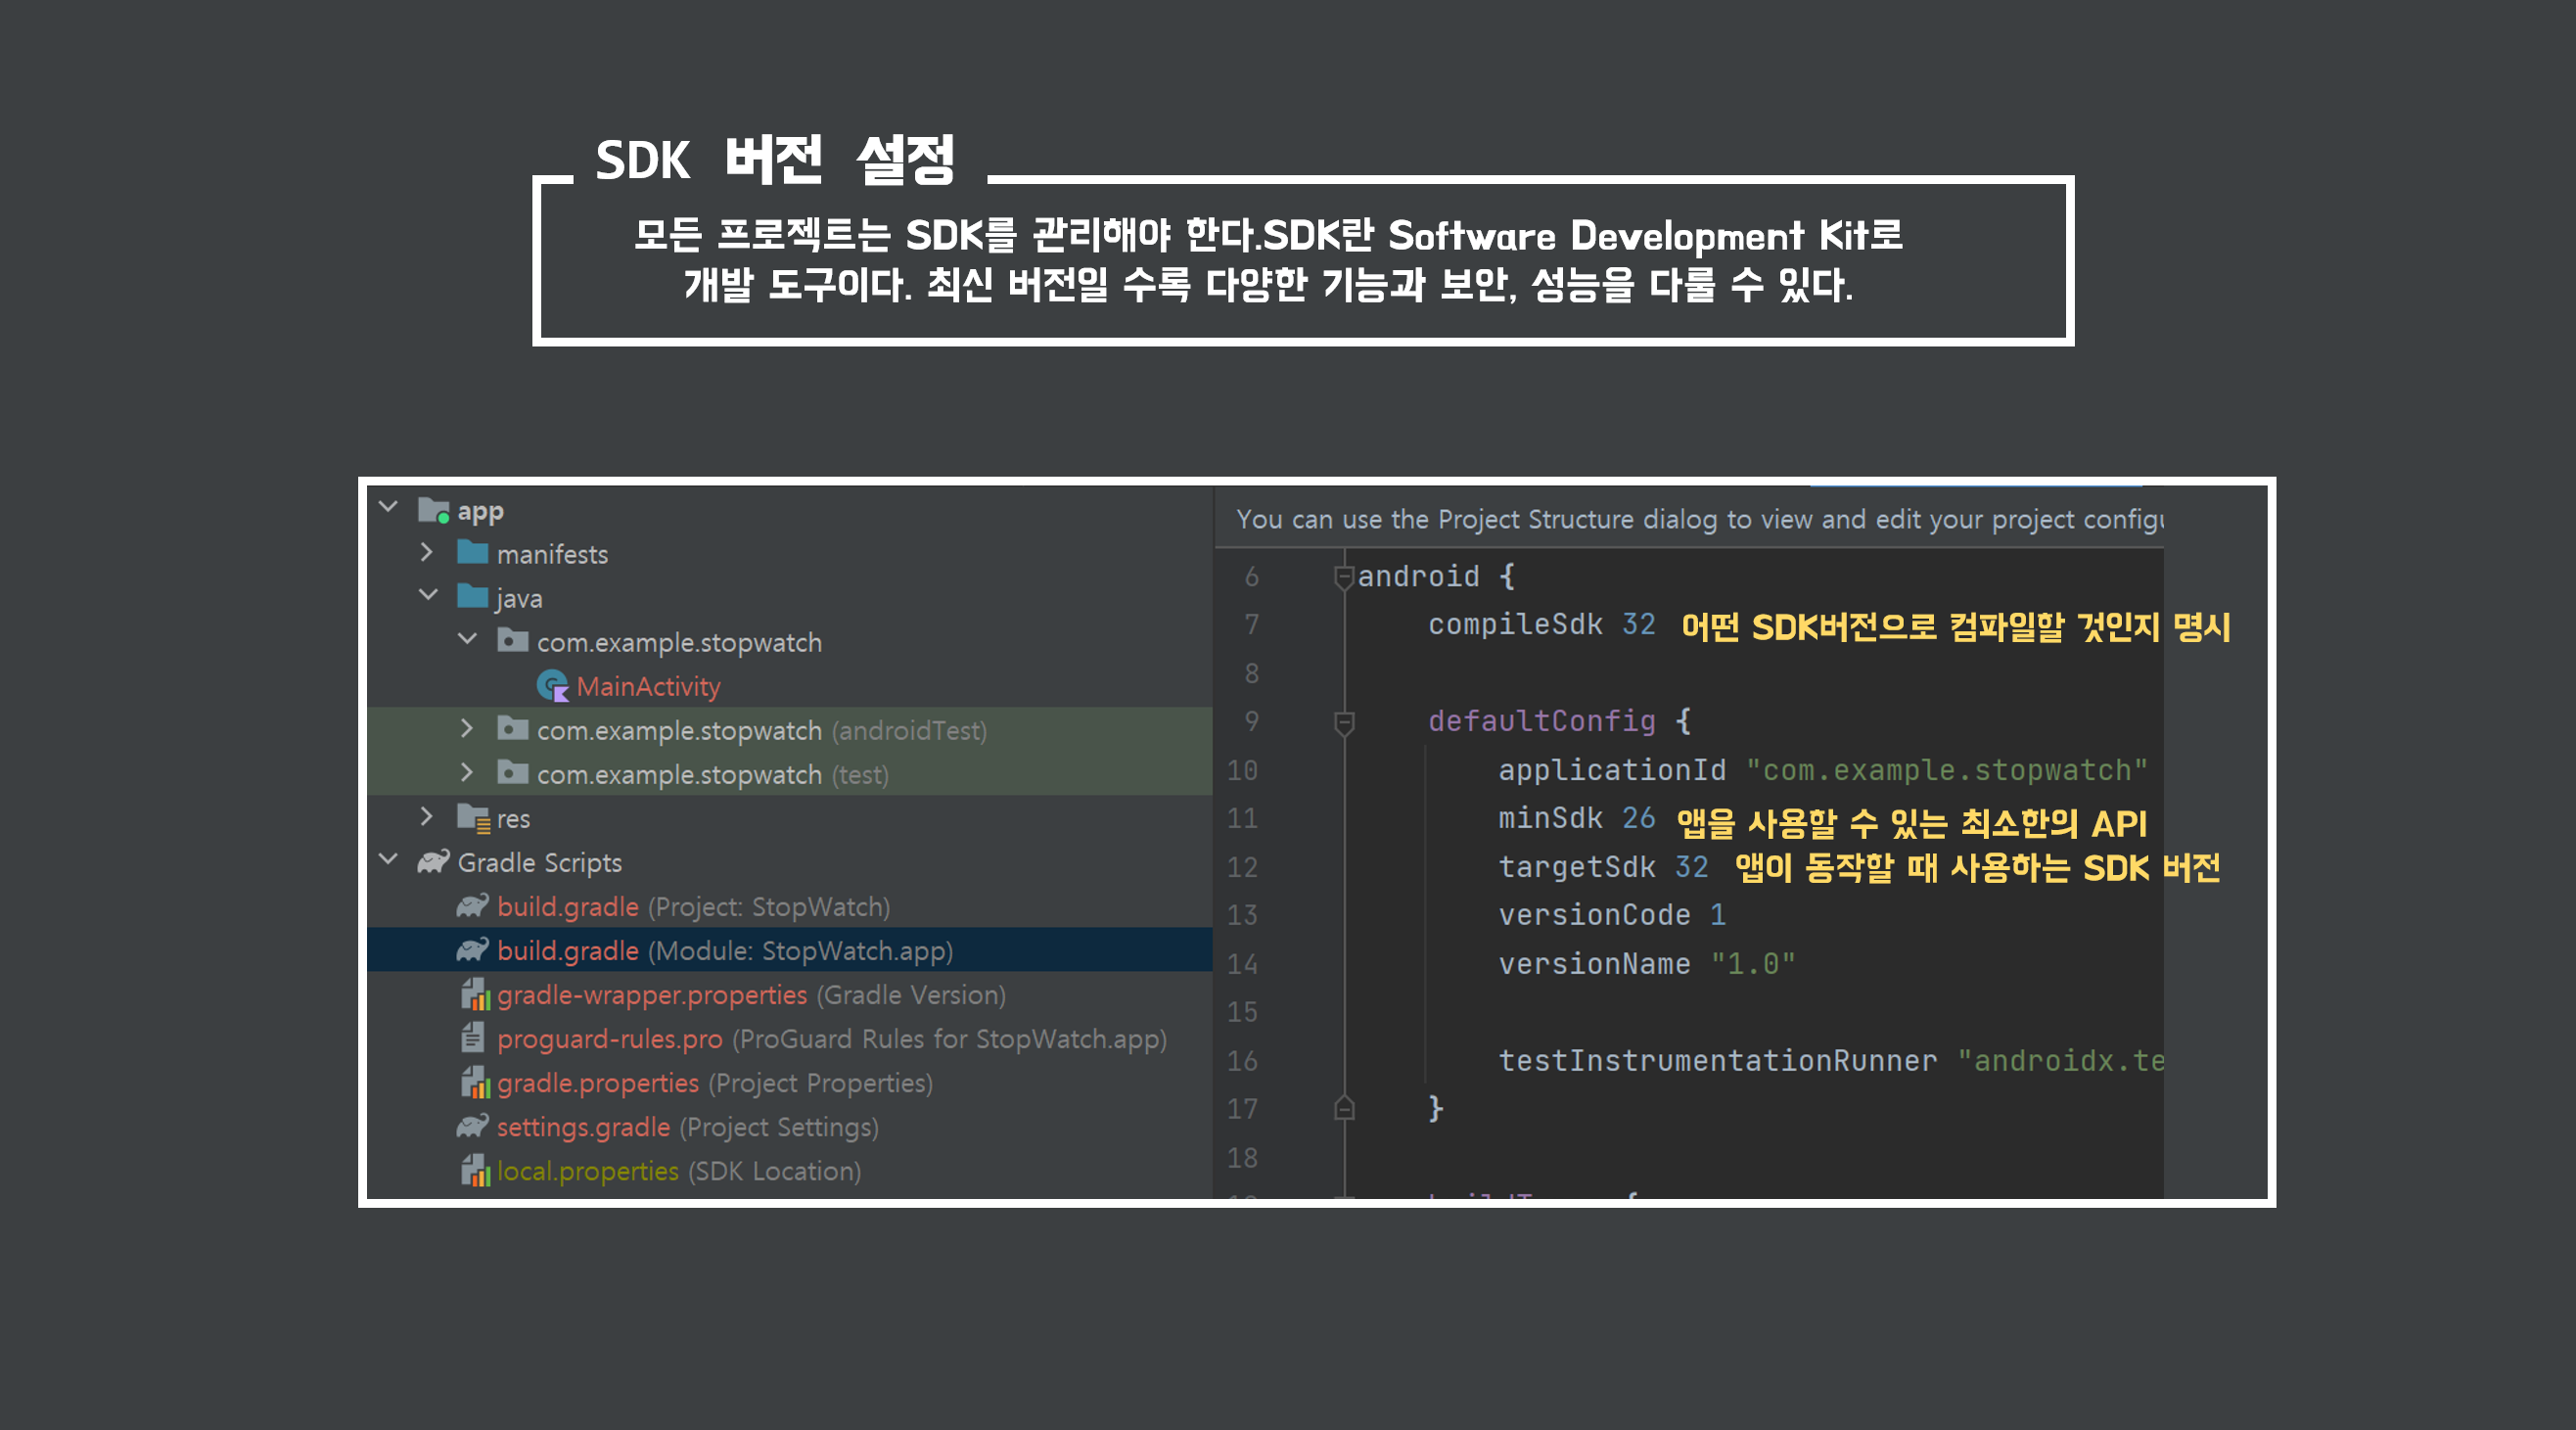
SDK 버전 설정
모든 프로젝트는 SDK를 관리해야 한다.SDK란 Software Development Kit로 개발 도구이다. 최신 버전일 수록 다양한 기능과 보안, 성능을 다룰 수 있다.
1. colors.xml과 strings.xml 설정
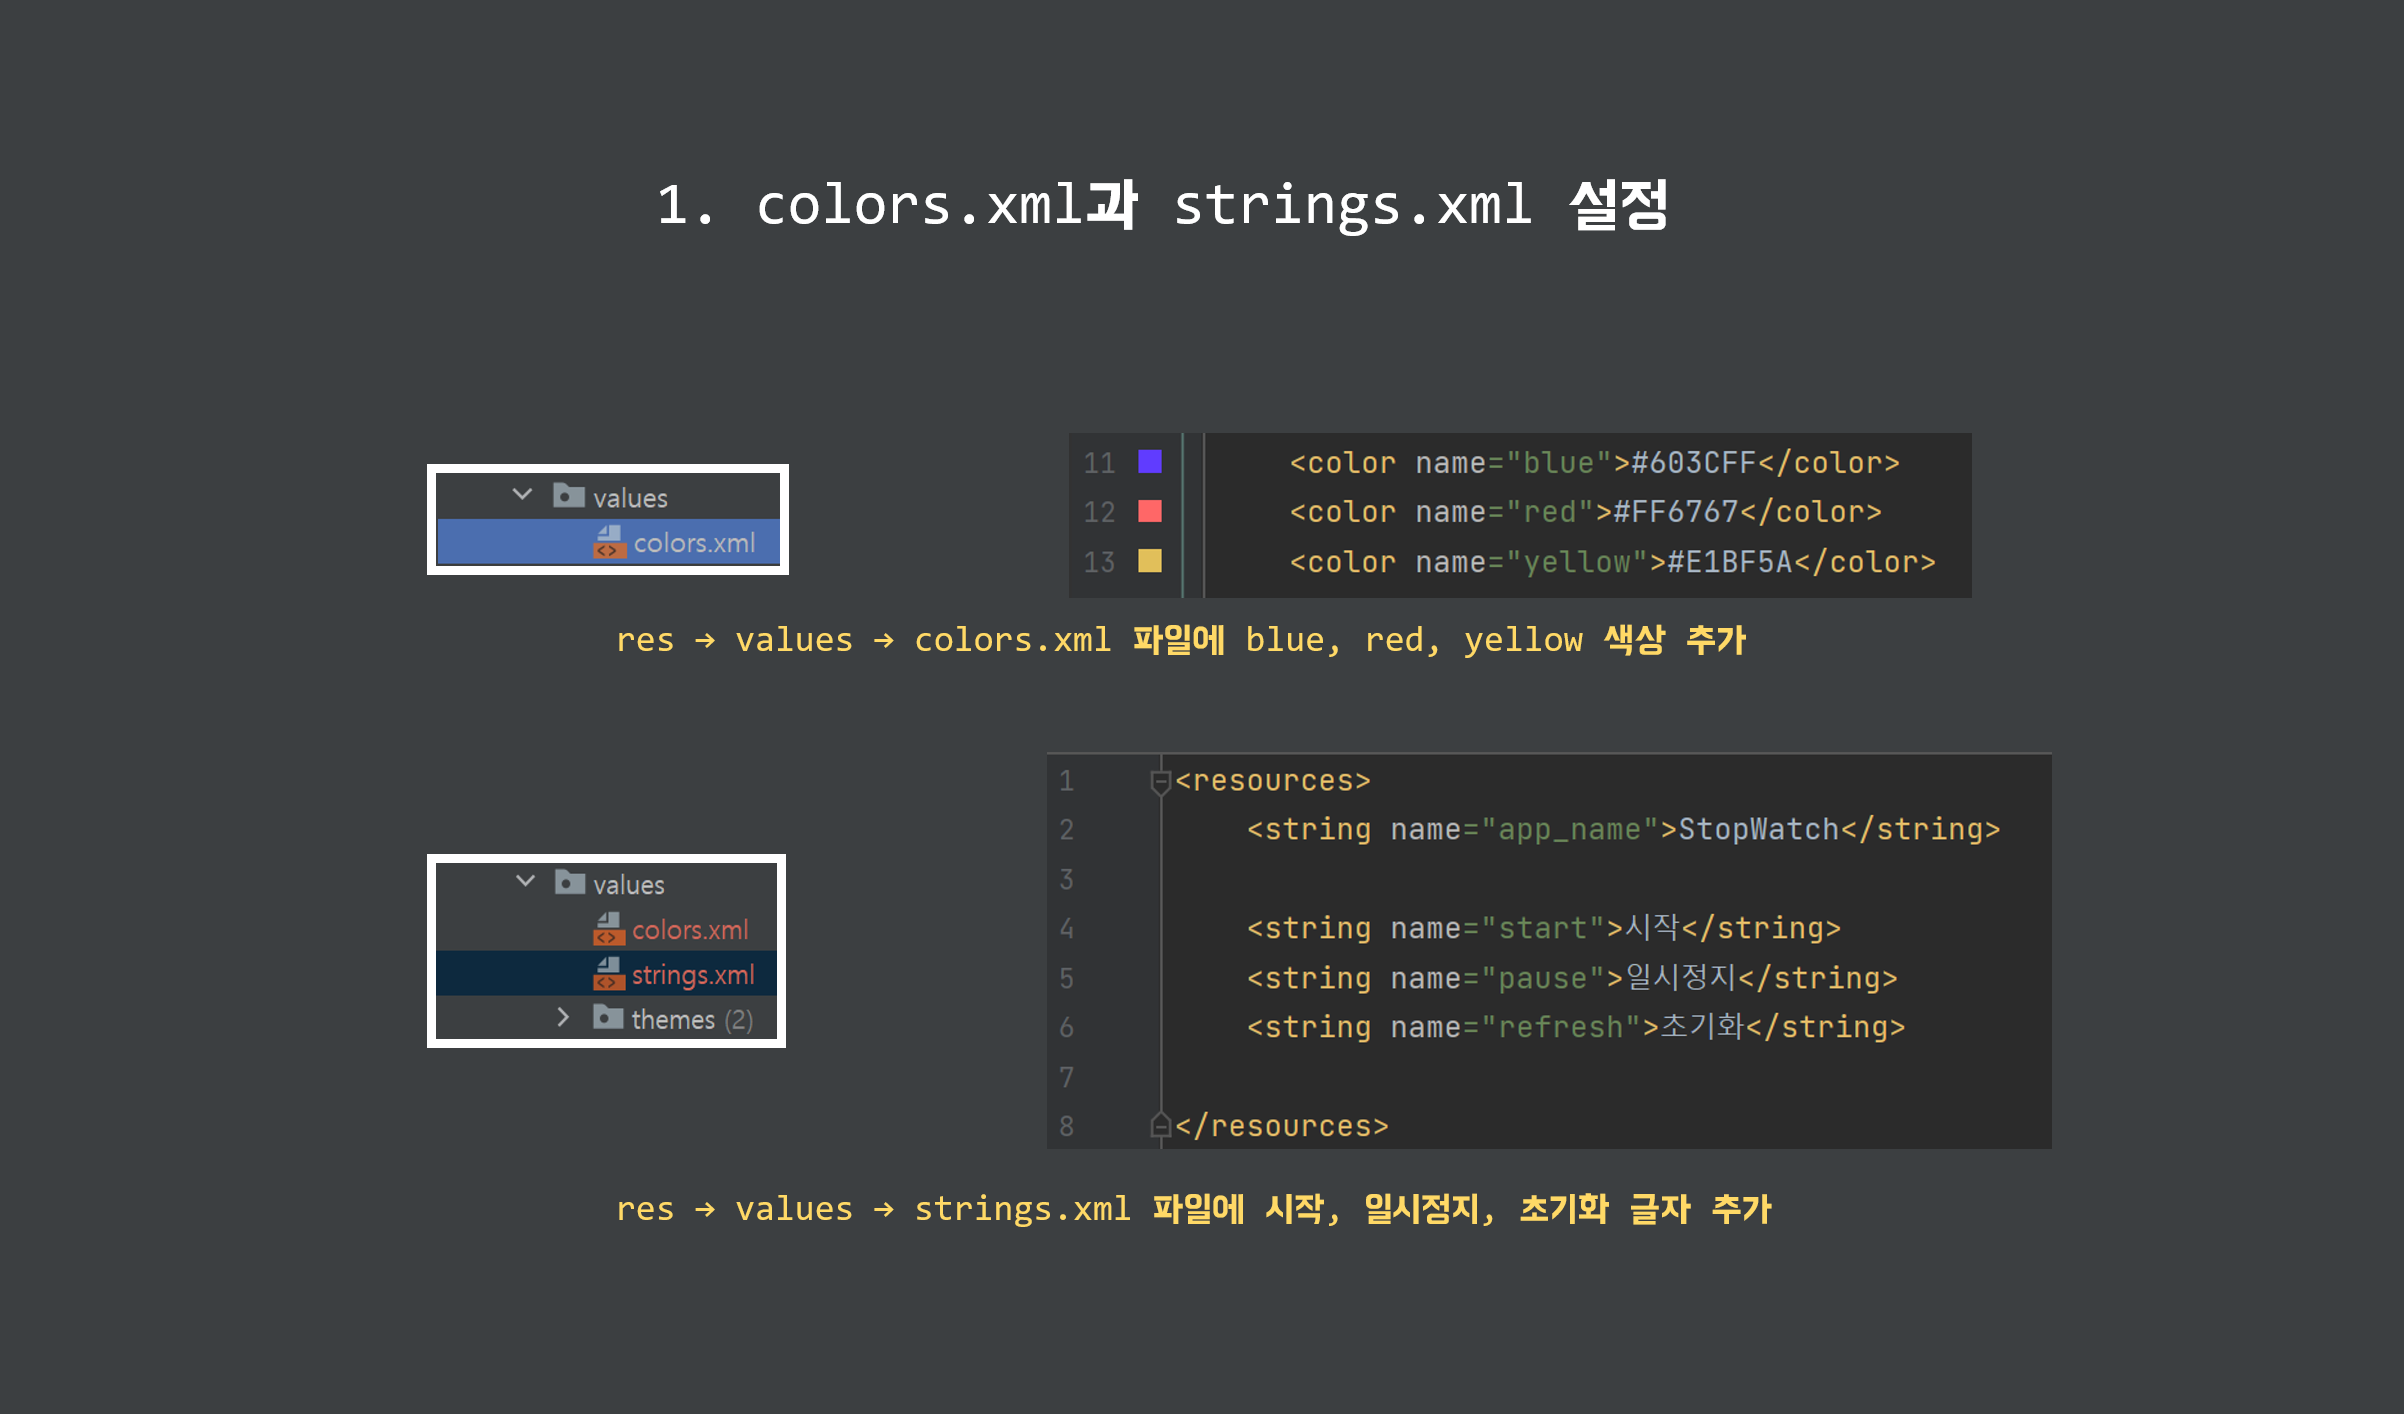
[res] → [value] → [colors.xml] 에 blue, red, yellow 색상 추가
[코드]
<?xml version="1.0" encoding="utf-8"?>
<resources>
    <color name="purple_200">#FFBB86FC</color>
    <color name="purple_500">#FF6200EE</color>
    <color name="purple_700">#FF3700B3</color>
    <color name="teal_200">#FF03DAC5</color>
    <color name="teal_700">#FF018786</color>
    <color name="black">#FF000000</color>
    <color name="white">#FFFFFFFF</color>

    <color name="blue">#603CFF</color>
    <color name="red">#FF6767</color>
    <color name="yellow">#E1BF5A</color>


</resources>
[res] → [value] → [strings.xml] 에 시작, 일시정지, 초기화 글자 추가
[코드]
<resources>
    <string name="app_name">StopWatch</string>

    <string name="start">시작</string>
    <string name="pause">일시정지</string>
    <string name="refresh">초기화</string>

</resources>
2. 버튼 추가
[activity_main.xml]

btn_start라는 id의 시작이라는 버튼 생성

btn_refresh라는 id의 초기화 버튼 생성
[코드]
<?xml version="1.0" encoding="utf-8"?>
<androidx.constraintlayout.widget.ConstraintLayout xmlns:android="http://schemas.android.com/apk/res/android"
    xmlns:app="http://schemas.android.com/apk/res-auto"
    xmlns:tools="http://schemas.android.com/tools"
    android:layout_width="match_parent"
    android:layout_height="match_parent"
    tools:context=".MainActivity">

    <Button
        android:id="@+id/btn_start"
        android:layout_width="wrap_content"
        android:layout_height="wrap_content"
        android:layout_marginBottom="80dp"
        android:backgroundTint="@color/blue"
        android:padding="20dp"
        android:text="@string/start"
        android:textColor="@color/white"
        android:textSize="16sp"
        android:textStyle="bold"
        app:layout_constraintBottom_toBottomOf="parent"
        app:layout_constraintEnd_toEndOf="parent"
        app:layout_constraintStart_toStartOf="parent" />

    <Button
        android:id="@+id/btn_refresh"
        android:layout_width="wrap_content"
        android:layout_height="wrap_content"
        android:layout_margin="50dp"
        android:backgroundTint="@color/yellow"
        android:padding="20dp"
        android:text="@string/refresh"
        android:textColor="@color/white"
        android:textSize="16sp"
        android:textStyle="bold"
        app:layout_constraintBottom_toTopOf="@+id/btn_start"
        app:layout_constraintEnd_toEndOf="parent"
        app:layout_constraintStart_toStartOf="parent" />

</androidx.constraintlayout.widget.ConstraintLayout>
※ 본 게시글은 'Joyce의 안드로이드 앱 프로그래밍 - 홍정아' 책의 내용과 Android Developers의 공식문서 내용을 참고하여 작성하였습니다.
전체 코드가 궁금하다면 아래 링크를 참고하시길 바랍니다.
'안드로이드(Android)' 카테고리의 다른 글
| 스톱워치(StopWatch)_3 / [Android-Kotlin] (0) | 2023.02.13 |
|---|---|
| 스톱워치(StopWatch)_2 / [Android-Kotlin] (0) | 2023.02.10 |
| 반응형 UI 만들기 : Guideline (0) | 2023.02.08 |
| ConstraintLayout(컨스트레인트 레이아웃) (0) | 2023.02.06 |
| RelativeLayout(상대적 레이아웃, 렐러티브 레이아웃) (0) | 2023.02.05 |